
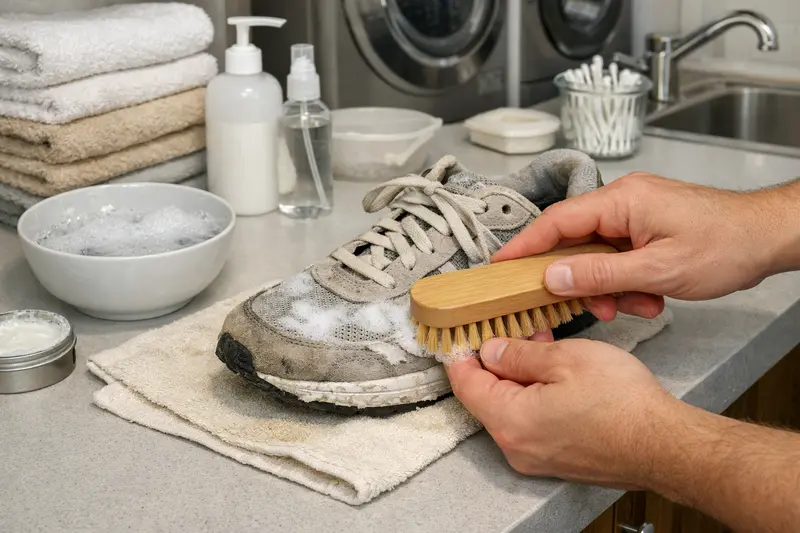
You just got home with a pair of used shoes you’re genuinely excited about, and now there’s this small voice in your head asking: is this okay to just… wear? Someone else had these on their feet for months, maybe years. That thought is completely normal, and honestly, it’s a good instinct to have. The fix isn’t complicated, but it does need to be done properly, because rushing this step is where most people go wrong.
Let’s walk through it the right way, material by material, so you’re not left guessing halfway through.
Why This Step Actually Matters
A used pair of shoes has history. Sweat has soaked into the insole, dust and dirt have settled into every seam, and depending on how they were stored, there’s a decent chance some odor has built up too. None of that means the shoes are ruined or unsafe. It just means they need a proper reset before they become part of your everyday rotation. Think of it less like “decontamination” and more like the same courtesy you’d give a secondhand water bottle or a borrowed jacket before using it.
The nice part is that once you clean a pair of used shoes properly, they often end up feeling fresher than shoes that have been sitting in someone’s closet unwashed for a year. If you’re still on the fence about whether buying pre-owned is a good idea at all, we’ve gone into that question in a lot more depth in our piece on whether second hand shoes are actually safe to wear worth a read if hygiene is your main hesitation.
Start With a Real Inspection, Not a Quick Glance
Before you touch soap or water, actually look at the shoe. Flip it over. Press on the sole. Smell the inside (yes, really). This tells you whether you’re dealing with a shoe that needs a light refresh or one that needs a deeper clean.
Here’s a simple way to think about what you’re looking at:
| What you notice | What it usually means | What to do |
|---|---|---|
| Mild, musty smell | Normal sweat buildup | Clean and disinfect as usual |
| Sharp, overpowering chemical or moldy smell | Possible fungal growth, the kind linked to conditions like athlete’s foot | Deep clean insoles separately, air out for longer, or reconsider the pair |
| Surface dirt and scuffs | Just wear and tear | Easy to clean, low risk |
| Deep, molded foot shape in the insole | Heavy prior use | Still wearable, but replace the insole if possible |
| Cracks or the sole peeling away from the shoe | Structural damage | Not worth fixing for daily wear |
This little check takes two minutes and saves you from wasting an hour cleaning a shoe that was never going to be great in the first place. And if part of what you’re checking is whether the pair is genuine in the first place, that’s a slightly different skill from spotting dirt — our buyer’s guide to spotting original vs. master copy shoes walks through that separately.
The Insoles Come Out First
If the insoles are removable, take them out before you do anything else. This is genuinely the most important step in the whole process, because the insole holds most of the sweat, bacteria, and odor a shoe collects over time far more than the outer material does.
Wash them by hand in warm water with a bit of mild soap or dish detergent. A soft brush or an old toothbrush works well for scrubbing stained spots. Rinse them out completely and let them dry flat, somewhere with good airflow. Don’t put them back into the shoe while they’re even slightly damp that’s basically an invitation for the exact odor problem you’re trying to get rid of.
If the insoles are in rough shape or the smell doesn’t fully go away after washing, it’s often just easier to swap them for a fresh pair. They’re cheap, and it instantly makes the whole shoe feel newer.
Disinfecting the Inside of the Shoe
Once the insoles are out, take a moment to actually disinfect the inside of the shoe itself, not just the insole. A simple mix of rubbing alcohol and water in equal parts works well here dampen a cloth with it and wipe down the interior, paying extra attention to the toe box and the heel area, since both trap moisture.
If you don’t have rubbing alcohol on hand, a basic disinfectant spray does the job too. Either way, let the inside air out for a bit afterward rather than closing the shoe back up right away.
Cleaning the Outside Depends Entirely on the Material
This is where a lot of people go wrong — they treat every shoe the same way, and that’s how leather ends up dried out or suede gets water stains that never come out. What works for one material can genuinely ruin another.
| Material | How to clean it | What to avoid |
|---|---|---|
| Canvas or mesh | Soft brush with mild detergent and water; machine washable on a delicate cycle if laces and insoles are removed | Hot water, which can shrink or warp the shape |
| Leather | Wipe with a barely damp cloth, then apply a leather conditioner once dry | Soaking it or leaving it wet, which cracks the surface over time |
| Suede | Dry suede brush only, work in one direction | Water of any kind — it stains and flattens the nap almost instantly |
| Rubber soles | Warm soapy water and an old toothbrush for scuff marks | Harsh chemicals, which can yellow the rubber |
If you’re not sure what material you’re dealing with, it’s always safer to test your cleaning method on a small, hidden section first — the inside of the tongue, for example — before going over the whole shoe.
Drying Is Not a Step You Can Rush
This is the part people skip, and it’s the one that actually matters most. A shoe that goes back into your closet even slightly damp is the perfect environment for the same bacteria and odor you just spent time removing.
Let shoes air dry somewhere with decent airflow, away from direct sunlight or a heater. Direct heat might sound like it speeds things up, but it also warps soles and dries out leather far faster than you’d want. Stuffing the shoes loosely with paper towels helps them hold their shape and speeds up drying from the inside out without any heat involved.
As a general guide:
| Shoe type | Typical drying time |
|---|---|
| Canvas or mesh sneakers | 12–24 hours |
| Leather shoes | 24–48 hours |
| Fully soaked or heavily cleaned pairs | Up to 48 hours |
Give it the full time, even if the outside feels dry to the touch — the inside, especially around the heel, often takes longer.
A Couple of Things Worth Clearing Up
There’s a common idea that putting shoes in the freezer kills bacteria. It doesn’t — it just puts it to sleep temporarily. The moment the shoe warms back up to room temperature, everything that was there before is active again. It’s not a real substitute for actually cleaning them.
There’s also a tendency to assume that if a shoe looks clean, it is clean. Visible dirt and bacteria aren’t the same thing, and a shoe can look spotless on the outside while still needing a proper interior clean.
If You’re Cleaning a Pair of Running Shoes Specifically
Running shoes deserve a small mention on their own, since they take more of a beating than most other styles and tend to hold onto sweat and odor more stubbornly. If running or gym shoes are your main use case, it’s worth reading why branded second hand shoes hold up so well for gym and running use — the short version is that performance materials in mesh uppers actually clean up better than you’d expect, as long as you skip the washing machine and stick to hand cleaning.
A few pairs that tend to be popular picks for exactly this reason include the Li-Ning Lightweight Cushion Running Sneakers, the Nike Men’s Lunar Apparent Running Shoe, and the Mizuno Gradient Performance Running Shoes all mesh-forward builds that respond well to the cleaning steps above.
Making This Easier From the Start
Honestly, the whole process gets a lot simpler when the pair you’re starting with has already been checked over before you bought it. That’s really the difference between a stressful cleaning session and a quick, easy one. When you’re browsing second hand shoes in Pakistan, pairs that come pre-graded for condition mean you already know what you’re walking into before you even start cleaning, no surprises, no guessing why something smells the way it does.
Once you’ve gone through this process once or twice, it stops feeling like a chore and just becomes a normal part of getting a new-to-you pair ready to wear. And honestly, there’s something kind of satisfying about taking a shoe that looked a little rough and turning it into something that feels completely your own.